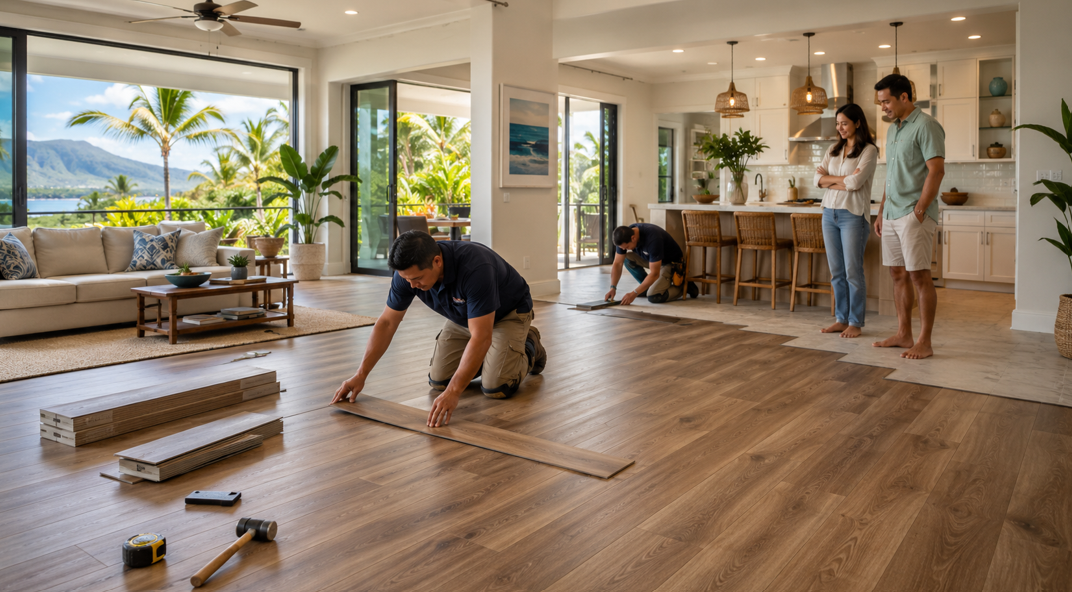
Luxury vinyl flooring has become one of the most practical and stylish flooring choices for Honolulu homes. It offers the warm look of hardwood, the durability needed for busy households, and the water-resistant performance that makes sense in Hawaii’s humid island climate. For homeowners who want a beautiful floor without the maintenance concerns of natural wood, luxury vinyl can be a smart choice for kitchens, living rooms, bedrooms, rental properties, and commercial spaces.
Still, choosing the material is only one part of the project. A successful floor also depends on proper installation. Even a high-quality luxury vinyl plank can underperform if the subfloor is not prepared correctly, the layout is rushed, or the wrong product is chosen for the room. That is why it helps to understand what the installation process involves before work begins.
At Selective Stone, homeowners, contractors, and designers can explore material options that suit real Hawaii homes. In Honolulu, flooring needs to handle humidity, foot traffic, moisture from beach days, and the day-to-day demands of island living. Knowing what to expect during luxury vinyl flooring installation can help you plan your project with confidence and avoid common surprises.
Why Luxury Vinyl Flooring Makes Sense in Honolulu
Honolulu homes need flooring that can handle a unique mix of beauty and performance. Between warm temperatures, high humidity, salt air, and indoor-outdoor living, floors often face more moisture and wear than they would in many mainland climates. Luxury vinyl flooring is popular because it offers practical benefits without sacrificing design.
One of the biggest advantages is moisture resistance. While no flooring should be treated carelessly, luxury vinyl is generally much better suited to humid environments than traditional hardwood. It can be used in kitchens, hallways, living areas, and some bathrooms, depending on the product and installation method. For families coming in from the beach, pets tracking in water, or homes with open windows and tropical airflow, that resilience matters.
Luxury vinyl also offers a wide range of design options. Many homeowners choose wood-look planks because they create a warm, natural feel without the expansion, contraction, and refinishing needs of real wood. Others prefer stone-look or tile-look vinyl for kitchens, bathrooms, and commercial spaces. Modern luxury vinyl can mimic natural textures and colour variation surprisingly well, making it easier to match a flooring style with cabinets, countertops, sinks, and fixtures.
Another benefit is comfort. Luxury vinyl is usually softer and warmer underfoot than tile, which can make a difference in homes where people walk barefoot. It can also be quieter than harder surfaces, especially when paired with the right underlayment or product construction.
For Honolulu homeowners balancing design, cost, durability, and climate performance, luxury vinyl flooring offers a strong all-round solution.
Step One: Choosing the Right Luxury Vinyl Product
Before installation begins, the first step is choosing the right product for the space. Not all luxury vinyl flooring is the same. Some products are better suited for residential bedrooms and living rooms, while others are made for kitchens, bathrooms, rental properties, offices, or commercial spaces with heavier foot traffic.
Thickness, wear layer, core type, plank size, surface texture, and installation method all matter. A thicker plank does not always mean the product is better, but it can affect comfort, stability, and how forgiving the floor is over minor subfloor imperfections. The wear layer is especially important because it helps protect the printed design from scratches, scuffs, and daily use.
For busy Honolulu households, a stronger wear layer may be worth considering. Homes with children, pets, guests, or frequent entertaining often need flooring that can withstand more activity. Rental properties and commercial spaces may also benefit from a more durable product designed for higher traffic.
The installation method is another key decision. Some luxury vinyl planks use a floating click-lock system, while others are glued down. Floating floors are often popular for residential projects because they can be efficient to install and may be easier to replace in sections. Glue-down vinyl can be a good choice for certain commercial settings or spaces where a very stable surface is needed.
The right choice depends on the room, the subfloor, the budget, and the expected use. This is where showroom guidance can be valuable. Seeing and comparing products in person helps homeowners understand colour, texture, plank width, and overall quality before committing.
Step Two: Measuring and Planning the Layout
Once the material direction is clear, accurate measuring comes next. Flooring installation depends on careful planning because ordering too little material can delay the project, while ordering too much can increase cost unnecessarily.
Rooms are measured by length and width, then adjusted for closets, hallways, angles, doorways, and irregular layouts. It is also standard to include extra material for cuts, waste, pattern matching, and future repairs. This extra amount is especially important when installing planks in rooms with many corners or transitions.
Layout planning affects the final appearance of the floor. Luxury vinyl planks should usually be staggered so the seams do not line up in an obvious pattern. The direction of the planks also matters. In many homes, planks are installed along the longest wall or in the direction of natural light, but the best choice depends on the room’s shape and design goals.
In Honolulu homes with open-plan living spaces, layout planning becomes even more important. A kitchen, dining area, and living room may flow together, so the flooring needs to look continuous and balanced. Transitions between rooms, existing tile, door thresholds, and built-in cabinetry should all be considered before installation starts.
This planning stage is also the time to think about trim, baseboards, stair noses, reducers, and transitions. These finishing pieces may seem small, but they help the installation look complete and professional.
Step Three: Preparing the Home Before Installation
Homeowners can make the installation process smoother by preparing the space in advance. Furniture, rugs, small appliances, décor, and loose items should be removed from the rooms being worked on. In kitchens or laundry areas, appliance movement may need to be planned carefully.
If existing flooring needs to be removed, that should be discussed before installation day. Old carpet, tile, laminate, vinyl, or damaged flooring may require different removal methods. Some floors come up easily, while others take more labour because of adhesives, uneven surfaces, or prior installation issues.
It is also important to consider access. Installers need space to bring materials into the home, cut planks if needed, and move around safely. In condos or multi-storey buildings, elevator access, parking, building rules, work hours, and noise restrictions may need to be checked ahead of time.
Honolulu homes can vary widely, from older houses to newer condos and commercial spaces. Each setting may have different preparation needs. Older homes may require more subfloor inspection, while condos may require acoustic underlayment or association approval.
Before installation, homeowners should also confirm where materials will be stored. Luxury vinyl should be kept indoors, protected from direct sunlight, and placed in a stable environment. Product instructions should always be followed regarding acclimation, storage, and handling.
Good preparation helps avoid delays and gives installers the space they need to complete the job properly.
Step Four: Subfloor Inspection and Preparation
Subfloor preparation is one of the most important parts of luxury vinyl flooring installation. The finished floor may be what everyone sees, but the subfloor underneath determines how well it performs.
Luxury vinyl needs a clean, dry, stable, and level surface. If the subfloor has dips, bumps, cracks, moisture issues, loose boards, old adhesive, or uneven patches, those problems can affect the finished installation. Planks may separate, click-lock systems may fail, adhesive may not bond properly, or imperfections may show through the surface.
In Honolulu, moisture is a major consideration. High humidity, ground-level slabs, older homes, and spaces near exterior doors can all create moisture concerns. If moisture is trapped below the flooring, it can lead to problems over time. Depending on the project, moisture testing may be recommended before installation.
Concrete subfloors need special attention. They should be dry, level, and free of debris or old adhesive residue. Wood subfloors should be secure, smooth, and free from movement. Any soft spots, squeaks, or damaged sections should be addressed before the luxury vinyl is installed.
Some subfloors may need patching or levelling. This step can add time, but it is worth doing correctly. Skipping subfloor preparation to move faster can lead to visible flaws and long-term performance issues.
A properly prepared subfloor gives luxury vinyl the stable foundation it needs to look good and last.
Step Five: Understanding Floating vs Glue-Down Installation
Luxury vinyl flooring is commonly installed using either a floating click-lock method or a glue-down method. Each has advantages, and the right choice depends on the space.
Floating luxury vinyl planks click together and sit over the subfloor without being glued across the entire surface. This method is popular in many residential settings because it can be efficient and flexible. Floating floors often work well in bedrooms, living rooms, hallways, and some kitchens. They may also be easier to repair because individual planks can sometimes be replaced more easily than glued materials.
Glue-down luxury vinyl is attached directly to the subfloor with adhesive. This method can provide a very stable feel underfoot and is often used in commercial spaces, large areas, or rooms with rolling loads. It may also be preferred where transitions need to be very low or where a more permanent installation is desired.
Both methods require proper subfloor preparation. Floating floors still need a level surface, and glue-down floors need an especially clean and suitable surface for adhesive bonding. The wrong installation method for the room can reduce performance, so it is important to follow product recommendations.
For homeowners comparing flooring options, installation method should be part of the conversation from the beginning. The best product is not just the one that looks good in a showroom. It is the one that fits the room, subfloor, climate, and daily use.
Step Six: Installation Day and What Happens On Site
On installation day, the first step is usually a final check of the room and materials. Installers may confirm the product, layout direction, transition points, and any special instructions. If existing flooring has already been removed, the subfloor will be checked again before the new floor goes down.
For floating floors, planks are cut and clicked together row by row. Expansion gaps are typically left around the perimeter according to manufacturer instructions. These gaps allow the floor to respond to small changes in temperature and humidity. They are later covered by baseboards or trim.
For glue-down floors, adhesive is spread in sections, and planks are placed carefully into the adhesive bed. Timing matters because adhesives often have specific working windows. Installers may roll the floor afterwards to ensure good bonding, depending on the product.
Cuts are made around doorways, corners, cabinets, columns, and other obstacles. This is where experience matters because clean cuts and careful fitting help the finished floor look professional. Door jambs may need trimming so planks can slide neatly underneath rather than being awkwardly cut around them.
The time required depends on the size of the space, subfloor condition, room complexity, and installation method. A simple room may move quickly, while a whole-home installation or a space with repairs, stairs, or complex transitions will take longer.
During installation, it is normal for there to be some noise, movement of materials, and temporary disruption. Planning ahead makes the process much easier.
Step Seven: Finishing Details After the Floor Is Installed
After the main flooring is installed, finishing details complete the project. These may include baseboards, quarter round, stair pieces, transition strips, reducers, end caps, and trims around doorways or adjacent flooring.
Finishing details matter because they affect both appearance and function. A beautiful luxury vinyl floor can look unfinished if transitions are poorly handled. Proper trim helps cover expansion gaps, protect edges, and create a clean transition from one surface to another.
In open-plan Honolulu homes, transition planning is especially important. The new floor may meet tile in a bathroom, stone in an entryway, carpet in a bedroom, or existing flooring in another room. Each transition should be smooth, safe, and visually consistent.
After installation, the area should be cleaned of dust and debris. Homeowners should inspect the floor, check visible seams, review transitions, and ask any care questions before furniture is moved back in.
Furniture should be returned carefully. Dragging heavy items across a new luxury vinyl floor can cause scratches. Felt pads under furniture legs are a simple way to protect the surface. Rolling chairs may require protective mats depending on the product and use.
A good finish does more than make the floor look complete. It helps protect the installation and supports long-term performance.
How Soon Can You Walk on Luxury Vinyl Flooring?
The answer depends on the product and installation method. Floating luxury vinyl floors can often be walked on soon after installation, but homeowners should still follow the installer’s or manufacturer’s guidance. Glue-down installations may require more time before normal use because the adhesive needs to set properly.
Heavy furniture and appliances may also require extra caution. Even if the floor can be walked on, heavy items should be moved carefully and placed according to recommended timelines. For glue-down floors, moving heavy furniture too soon can affect the bond.
Cleaning should also wait until the floor is ready. Dry sweeping may be allowed sooner, but wet cleaning should follow product instructions. Excess water is never a good idea, even with water-resistant flooring. Luxury vinyl can handle moisture better than many materials, but standing water should still be wiped up promptly.
In Hawaii’s humid climate, allowing the installation to settle properly is important. Rushing the post-installation stage can create avoidable issues. A little patience helps protect the final result.
Caring for New Luxury Vinyl Flooring
Luxury vinyl is known for being easy to maintain, but proper care still matters. Sweep or vacuum regularly to remove sand, dust, and grit. This is especially important in Honolulu homes where beach sand and outdoor debris can be tracked indoors. Small particles can act like abrasives underfoot and dull the finish over time.
For cleaning, use a product recommended for luxury vinyl flooring. Avoid harsh chemicals, abrasive scrubbers, steam mops, wax, polish, and overly wet mopping. A damp mop is usually enough for routine cleaning. Spills should be wiped promptly, especially coloured liquids, oils, or sticky residues.
Use mats at entryways to reduce tracked-in dirt and moisture. Choose mats that are safe for vinyl, as some rubber-backed mats may react with certain flooring surfaces. In areas with strong sunlight, window treatments can help reduce UV exposure and prevent uneven fading or heat build-up.
Furniture pads are another simple protection step. Chairs, tables, sofas, and stools can scratch the surface if moved frequently without pads. For office chairs, use a floor mat designed for vinyl flooring.
Luxury vinyl is durable, but it is not indestructible. Treating it with reasonable care helps it stay attractive and comfortable for years.
Common Installation Mistakes to Avoid
Many flooring problems come from avoidable installation mistakes. One common issue is ignoring the subfloor. If the surface underneath is uneven, damp, dirty, or unstable, the finished floor may not perform properly.
Another mistake is choosing flooring based only on appearance. A product may look beautiful but still be the wrong fit for a high-traffic room, rental property, or moisture-prone space. Wear layer, core construction, installation method, and warranty details all matter.
Poor layout planning can also create disappointing results. Repeating plank patterns, awkward seams, narrow cuts along walls, or poorly placed transitions can make a new floor look less professional.
Skipping expansion gaps is another problem for floating floors. Floors need space to respond to normal environmental changes. If planks are installed too tightly against walls or fixed objects, buckling can occur.
Using the wrong cleaning products after installation can also damage the floor. Steam, wax, polish, and harsh cleaners are common causes of surface problems.
Working with knowledgeable professionals and choosing materials carefully can help homeowners avoid these issues from the start.
Final Thoughts: A Smooth Installation Starts with the Right Planning
Luxury vinyl flooring can be an excellent choice for Honolulu homes. It offers durability, water-resistant performance, comfortable everyday use, and design flexibility that fits Hawaii’s island lifestyle. Whether you want the look of hardwood without the maintenance or a practical floor for a busy family home, luxury vinyl is worth considering.
The installation process is straightforward when properly planned, but every step matters. Product selection, measuring, subfloor preparation, installation method, finishing details, and post-installation care all affect the final result. In Honolulu’s humid climate, moisture awareness and careful preparation are especially important.
A successful flooring project is not just about what you install. It is about choosing a product that suits your space, your routine, and Hawaii’s climate. With the right guidance, luxury vinyl flooring can give your home a beautiful, practical foundation for years of island living.
If you are planning a flooring update in Honolulu and want to compare luxury vinyl options in person, visit showroom to explore materials that fit your home, lifestyle, and budget.